The Add Fuel Receipt page allows you to manage fuel deliveries.
To get to the Add Fuel Delivery Screen, select Admin on the Main Toolbar, then select Open/Closed Fuel Invoices. On the Open/Closed Fuel Invoices page, right click the fuel invoice you would like to go to the Accept Fuel Receipt Page for, then click Accept Receipt.
The Fuel Grade, Volume being Delivered (in gallons) , Price (per gallon), Extended Price will be displayed.
1. Select the grade of the fuel being added to the invoice from the Grade drop down menu.
2. Enter the volume being delivered in the Volume text box.
3. Enter the price per gallon invoiced into the $ Per Gallon text box.
4. When you are finished, click Add to Fuel Invoice, and repeat for each grade of fuel being delivered.
5. You can edit the Volume Delivered, and the Price invoiced by clicking Edit next to that grade of fuel.
6. When you are finished, click Update to save your changes.
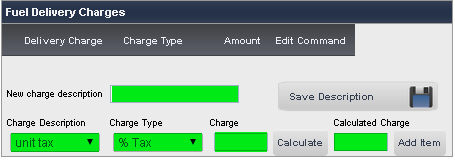
1. Select the Charge Description from the Charge Description drop down menu.
2. Select either % Tax, Flat Fee, or Unit tax from the Charge Type drop down menu.
3. Enter the charge in the Charge text box.
4. Click Calculate to view the charge amount.
5. To add this charge to the invoice, click Add Item.

1. Select the method of payment from the Method of Payment drop down menu.
2. Either enter the date of that payment into the Date text box, or select one using the calendar tool to the right of that text box.
3. Enter the amount of that payment in the Amount text box.
4. Click Add Payment.
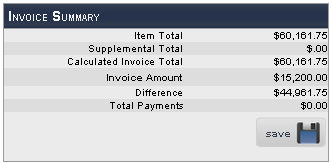
The Item Total, Supplemental Total, Calculated Invoice Total, Invoice Amount, the Difference between the calculated invoice total and the invoice amount, and total payments will be displayed.
To save the changes to that invoice, click Save Invoice.

1. Enter the Delivery Date in the text box, or select one using the calendar tool to the right of the text box.
2. To post this invoice, click Post this Invoice.
frmReceiveInvoice.aspx?InvoiceID=5921