The Accept Receipt Page allow you to manage deliveries and invoices.
To get to the Accept Receipt page, select Admin from the Main Toolbar, then Invoices, then click Open/Closed Invoices. On the Open/Closed Invoices page, right click the invoice you would like to go to the Accept Receipt page for, and click Accept Receipt. Note that you can not preform this action for EDI invoices.
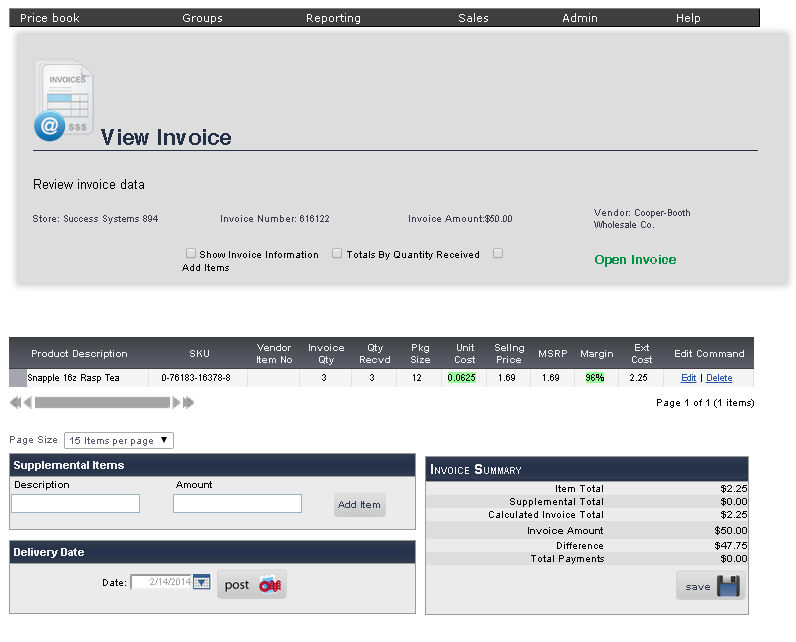
The Product Description, SKU, Invoice Quantity, Quantity Received, Package Size, Unit Cost, Selling Price, MSRP, Margin, and Extended Cost will be displayed for each item on the invoice. Note that the margin will be highlighted in red if the Margin is less than the target margin set for the department in which that item is located. It will be highlighted in green if the item's margin is at or exceeds the target margin set for that department.
You can edit the Invoice Quantity, the Quantity Received, and the Package Size by clicking Edit next to that item. When you are finished making changes, click Update.
You can delete an item from the invoice by clicking Delete. Right clicking an item will allow you go to the Main Editing Screen for that item, View History, Go to Inventory Update Log, Update Price for selected items, or Update Cost. You can select multiple items using the SHIFT and CTRL keys.
1. Check the box next to Show Invoice Information to display the details of that Invoice.
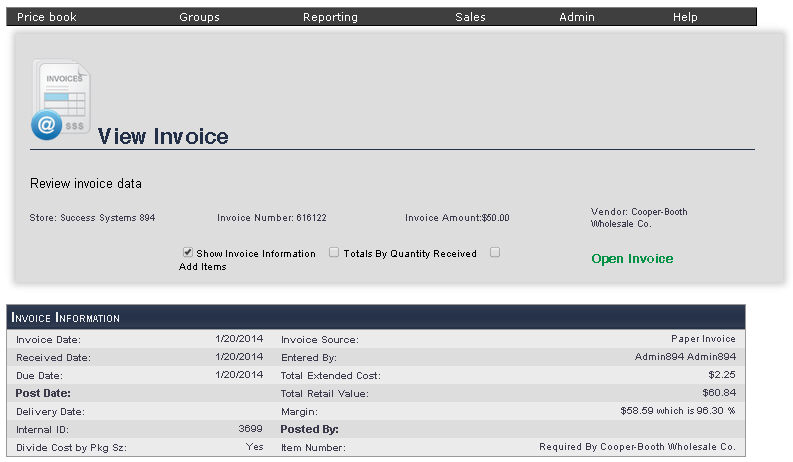
The Invoice Date, Received Date, Due Date, Post Date, Delivery Date, Internal ID, If the cost is being Divided by Package Size, Invoice Source, who Entered the invoice, Total Extended Cost, the Total Retail Value, Margin, who Posted the invoice, and if the Item Number is required by the vendor will be displayed.
The list of items on the invoice will be resorted in descending order by the Quantity Received of each item.
1. Check the box next to Add Items by clicking it.

2. Enter the items being added to the invoice. To search for an item by UPC, ensure that the circle next to UPC under Search by is filled. To search for the item by Item number, fill circle next to Item Number by clicking it
3. If you would like to enter the extended cost of the item, ensure that the circle next to Extended Cost is filled under Cost is. To enter the unit cost for the item. fill the circle next to Unit Cost by clicking it.
4. Enter the UPC of the item or its item number in the UPC / Item Number text box.
5. Enter the quantity received in the Quantity text box.
6. Enter the package size in the Pkg Size text box.
7. Either enter the unit cost of the item or the extended cost of the item depending on your previous selection in the Cost text box.
8. Enter the MSPR of the item into the MSPR text box..
9. After you have entered all of the items on the invoice, click Add Items to Invoice. If you need to add more items than there are lines available, you can do so by clearing the page. If you are trying to add an item that is not in your price book, click Add To Price Book.

If the invoice includes any non-retail items (such as soda crates, or milk cartons) you can enter them under Supplemental Items.
1. Enter the Description of that item in the Description text box.
2. Enter the Amount (in dollars) charged for that item into the Amount text box.
3. Click Add Item, and repeat for any additional supplemental items.
The Item Total, Supplemental Total, Calculated Invoice Total, Invoice Amount, the Difference between the calculated invoice total and the invoice amount, and total payments will be displayed.
To save the changes to that invoice, click Save Invoice.

1. Enter the Delivery Date in the text box, or select one using the calendar tool to the right of the text box.
2. To post this invoice, click Post this Invoice.
frmReceiveInvoice.aspx?InvoiceID=5917